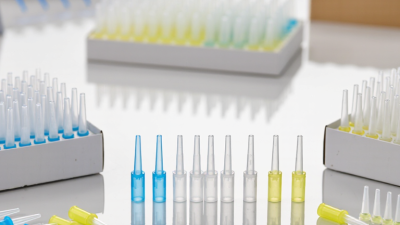
10 Tips for Choosing the Right Pipette Tip Box?

Choosing the right pipette tip box can seem like a small purchasing decision. In daily laboratory work, however, it affects contamination control, workflow speed, and liquid-handling accuracy. A box that fits poorly may slow every transfer. A weak lid can also expose sterile tips to dust, aerosols, or accidental contact.

This guide examines ten practical factors before you commit to a product. These include tip compatibility, rack dimensions, material quality, sterility, sealing performance, labeling, and reusability. It also considers how easily technicians can open the box while wearing gloves. A good design should protect the tips and remain comfortable during repeated use. That detail is easy to overlook.

There is no universal best choice. A box suitable for routine water samples may fail in a demanding molecular biology workflow. My own preference has changed after seeing how small alignment errors caused repeated loading problems. Manufacturer specifications matter, but real bench experience matters too. Check fit with your pipette model, review documented quality controls, and test one box before ordering in bulk. The cheapest option may become expensive when tips jam, lids crack, or contamination forces repeated work. Keep the evaluation practical. Your laboratory’s sample volume, storage conditions, and staff habits should guide the final decision.

10 Tips for Choosing the Right Pipette Tip Box?

Identify Pipette Tip Box Types and Laboratory Applications

10 Tips for Choosing the Right Pipette Tip Box?

Pipette tip boxes should match the application, not merely the pipette volume. Standard tips suit routine buffers and aqueous samples. Filter tips provide a stronger barrier for PCR, cell culture, and sensitive molecular assays. Low-retention tips help with viscous liquids, proteins, and costly reagents. Wide-bore tips reduce shear stress during delicate cell handling. Small details matter.

Box design also affects workflow. A hinged, autoclavable rack supports repeated preparation, while a sterile, sealed box reduces exposure during clean procedures. Conductive racks can support controlled handling near sensitive electronic instruments. According to Grand View Research’s 2024 laboratory automation report, automation is expanding as laboratories seek higher throughput and fewer manual errors. Tip geometry must therefore fit multichannel pipettes and automated platforms. Compatibility is not optional.

ISO 8655-2 defines performance requirements for piston-operated volumetric apparatus, but the tip remains part of the working system. Check seal quality, fit, material compatibility, and documented lot control. The WHO Laboratory Biosafety Manual, fourth edition, stresses risk-based containment and contamination control. In practice, I inspect each rack for cracked hinges, warped wells, and loose tips before use. I once treated “universal” fit as reliable; that judgment was too casual. A box may look clean yet expose tips to dust during repeated opening. Choose the smallest practical tip range, verify certification claims, and record the application-specific reason for each choice.

Evaluate Tip Compatibility with Pipette Models and Volumes

Choosing the right pipette tip box starts with the pipette, not the packaging. Confirm the pipette model, shaft shape, tip cone, and recommended volume range before ordering tips. A tip may appear universal, yet small differences can cause leaks or uneven sealing.

Fit matters. Attach a tip using normal pressure, then inspect the connection. It should remain secure without forcing the pipette shaft into the plastic. Excessive resistance can damage the ejector or affect dispensing consistency. For low-volume work, use tips designed for accurate delivery at the intended range, rather than relying on a large tip for every task. A 10 µL pipette and a 1,000 µL pipette require different tip geometries and performance expectations.

Test it.

In routine laboratory work, I would check several tips from different positions in the box. Look for bent ends, weak attachment, or liquid droplets left inside the tip. Filtered and non-filtered tips also serve different contamination-control needs, so the box should clearly identify the tip type. Compatibility with electronic or multichannel pipettes deserves extra attention; spacing and ejection force may differ. I have sometimes trusted a “universal” label too quickly. That assumption can waste samples and create hidden variation. A short gravimetric check with water can reveal whether the selected tip performs reliably across the working volume.

Compare Sterility, Packaging, and Contamination-Control Features

10 Tips for Choosing the Right Pipette Tip Box?

Choosing a pipette tip box starts with the contamination risk of your workflow. Sterile tips should include clear sterilization information, lot identification, and an intact seal. Do not trust the word sterile alone. Ask for certificates and traceability records when working with sensitive samples. Packaging should protect tips during storage, transport, and bench handling. Individually sealed racks offer strong protection, but they create more waste. Bulk bags may reduce packaging, yet each refill adds an exposure point. That trade-off matters in cell culture and molecular assays.

Inspect the box design closely. A tight, stable lid helps prevent airborne particles from settling on exposed tips. Transparent materials make tip levels easier to check without opening the box. Hinges should open smoothly and stay clear of the working area. Racks must fit the pipette firmly, without forcing the tip onto the shaft. Small gaps can cause uneven pickup or accidental contact. Refillable systems need dedicated, clean transfer procedures. They are not automatically safer.

I once prioritized low packaging volume and overlooked handling frequency. That was a poor shortcut. In busy laboratories, repeated opening can outweigh the benefits of reduced waste. Choose packaging that matches your bench routine, storage conditions, and staff training. Record lot changes and inspect damaged seals before use. Keep an eye on condensation, dust, and crowded workspaces. These details often reveal contamination risks earlier than a failed result.

10 Tips for Choosing the Right Pipette Tip Box

Compare sterility, packaging, and contamination-control features before selecting a pipette tip box.

Indicative ratings use a 1–5 scale based on commonly specified product configurations: 1 means limited protection or convenience, while 5 means the feature is typically strongest. Sterile, individually wrapped racks generally provide the highest contamination-control level, while bulk non-sterile tips prioritize cost and storage efficiency.

Assess Box Design, Tip Organization, and Ease of Handling

10 Tips for Choosing the Right Pipette Tip Box?

A good tip box protects sterility, supports fast selection, and reduces awkward hand movements.

ISO 8655-2:2022 stresses controlled performance testing across defined volume ranges. The box should match the pipette system closely.

Check tip seating, rack stability, and lid clearance before purchase. I have seen poor fits create loose tips and repeated handling.

Small defects become costly habits.

Tip 1: Choose a hinged lid that opens smoothly with one hand.

Tip 2: Look for clear numbering and strong color contrast.

Tip 3: Select a layout that separates unused, used, and reserved tips.

Tip 4: Test whether the rack stays flat during pickup.

Tip 5: Avoid lids that scrape gloves or block nearby equipment.

Tip 6: Confirm compatibility with low-retention or filtered tips.

Tip 7: Prefer stackable boxes with visible fill levels.

Tip 8: Check whether the material tolerates the laboratory’s approved cleaning method.

WHO’s Laboratory Biosafety Manual, fourth edition, recommends risk-based workflows, clear segregation, and equipment that supports safe handling. These principles apply to tip organization, even when the box seems minor.

Tip 9: Place high-use volumes within easy reach.

Tip 10: Record lot numbers when traceability matters.

A neat box saves seconds. Maybe not always.

If the lid needs force, or the grid is hard to read under cool white light, redesign the setup.

Ease of handling should be tested by real users, wearing gloves, during a normal busy shift.

Balance Quality, Sustainability, and Total Purchasing Cost

10 Tips for Choosing the Right Pipette Tip Box

Pipette tip boxes look simple, but their cost reaches far beyond the invoice. In daily laboratory work, I check fit, lid stability, tip alignment, sterility, and pipette compatibility. A box that opens smoothly reduces handling errors. A loose lid can expose tips to dust. Ask for documented manufacturing controls, lot traceability, and clear sterilization information. Do not accept vague claims. Test first.

Sustainability should be measurable, not decorative. Compare reusable, recyclable, and reduced-plastic designs by actual use cycles. A reusable box may require washing, drying, labor, and water. Those costs belong in purchasing calculations. Check whether inserts can be replaced without discarding the case. Review packaging volume and shipping frequency. Fewer deliveries can reduce emissions. Sometimes, a lighter disposable option has a smaller total footprint. The answer depends on local waste systems, energy sources, and contamination rules.

Total purchasing cost includes tips, boxes, storage, staff time, failed transfers, and disposal. Calculate cost per usable tip, not cost per box. Compare defect rates across several lots. Keep records for three months. That reveals patterns, though not every risk. I once favored a low-priced option and underestimated awkward lid removal. The wasted seconds accumulated. I was wrong. Ask users to score ergonomics, sealing, and loading speed. Then balance evidence, sustainability, and budget before changing supply.

10 Tips for Choosing the Right Pipette Tip Box: Balance Quality, Sustainability, and Total Purchasing Cost

No. Selection Tip Key Evaluation Dimension Practical Target or Benchmark Why It Matters Purchasing Impact
1 Match the tip to the pipette Tip-orifice fit and attachment force Use tips specifically validated for the pipette model; attachment should be secure without excessive force. Poor fit can cause leakage, inaccurate aspiration, and repetitive hand strain. A compatible tip may reduce failed runs, retesting, and labor costs.
2 Select the correct volume range Tip capacity and minimum working volume Choose a tip that covers the intended liquid volume; common ranges include 0.1–10 µL, 2–200 µL, and 100–1,000 µL. Using a tip outside its intended range can reduce accuracy and precision. The lowest unit price may be misleading if more tips are wasted through poor volume control.
3 Verify material quality Polypropylene grade and manufacturing consistency Prefer laboratory-grade polypropylene with consistent wall thickness, smooth surfaces, and low particulate levels. Consistent molding supports reliable liquid release and reduces contamination risk. Higher consistency can lower sample loss and quality-control expenses.
4 Choose the right sterility level Sterile, non-sterile, and certified status Use certified sterile tips for cell culture, molecular biology, and other contamination-sensitive work; use non-sterile tips for routine non-critical tasks. Unnecessary sterilization adds cost, while insufficient sterility can invalidate experiments. Segmenting purchases by application avoids paying sterile-tip prices for every procedure.
5 Consider filter-tip requirements Aerosol-barrier filter and sample protection Use filter tips when protecting the pipette or sample from aerosols is essential; confirm filter material does not interfere with liquid flow. Filters help reduce carryover and contamination in sensitive workflows. Reserve filter tips for high-risk applications to balance protection with consumable cost.
6 Evaluate low-retention performance Residual liquid after dispensing For viscous, protein-rich, or detergent-containing liquids, compare residual volume using the actual application matrix. Less liquid retention improves recovery and reduces variability between samples. A slightly higher tip price can be justified when it reduces expensive reagent loss.
7 Compare box formats Bulk, reload, and hinged-rack packaging Use reload systems when compatible racks are already available; use complete racks when convenience, traceability, or sterile handling is the priority. Packaging affects storage space, handling time, and the amount of discarded plastic. Reloads can reduce packaging and shipping costs, but only if rack compatibility is assured.
8 Assess sustainability claims Recycled content, recyclability, and packaging weight Check documented recycled content, local recycling acceptance, and whether the box and insert can be separated for disposal. A sustainability claim is useful only when supported by clear material and disposal information. Lower packaging weight and reusable racks may reduce waste-management and shipping costs.
9 Check box usability and storage Lid stability, stackability, labeling, and footprint Prefer secure lids, clear lot labeling, stable stacking, and standard 96- or 384-position layouts where applicable. Good ergonomics reduce dropped tips, mix-ups, and bench-space requirements. Improved organization lowers handling time and inventory errors.
10 Calculate total purchasing cost Unit price, freight, waste, labor, and failure cost Compare cost per usable tip, including packaging, shipping, rejected tips, storage, disposal, and staff handling time. The cheapest box price does not always produce the lowest cost per successful test. Use a total-cost model before approving large-volume purchases or switching formats.

Procurement note: Performance should be verified with the intended pipette, liquid type, volume range, and laboratory workflow before making a high-volume purchase.